How to setup Eve Motionblinds top-down bottom-up honeycombs with Apple HomeKit
Leia isto num minuto
Qual é a novidade?
- Este artigo explica como configurar os estores em favo de mel Motionblinds Top-Down Bottom-Up (TDBU) com o Apple HomeKit. Descreve o processo de emparelhamento e como os motores duplos são configurados na app Apple Home.
O que precisa de saber
- Configuração TDBU: Estas persianas em favo de mel utilizam dois motores para controlar as secções superior e inferior de forma independente. Cada motor deve ser adicionado separadamente no HomeKit.
- Configuração do HomeKit: O emparelhamento é concluído com a leitura do código QR do HomeKit na app Casa da Apple. É necessário um dispositivo Apple.
- Atribuição da divisão: Após o emparelhamento, ambos os motores podem ser atribuídos à mesma divisão para um controlo coordenado.
- Controlo combinado: Os utilizadores podem operar as secções superior e inferior individualmente ou criar cenas para um movimento sincronizado.
- Limitação do ecossistema Apple: A funcionalidade depende da compatibilidade com o Apple HomeKit e requer um hub doméstico Apple adequado para acesso remoto.
Principais conclusões
- Para configurar as persianas em favo de mel TDBU com o HomeKit, é necessário emparelhar os dois motores individualmente e organizá-los na app Casa da Apple. Uma vez configurado, está disponível um controlo superior e inferior flexível.
- Este guia é relevante para instaladores e utilizadores do Apple Home que integram persianas alveolares de motor duplo no seu ambiente doméstico inteligente.
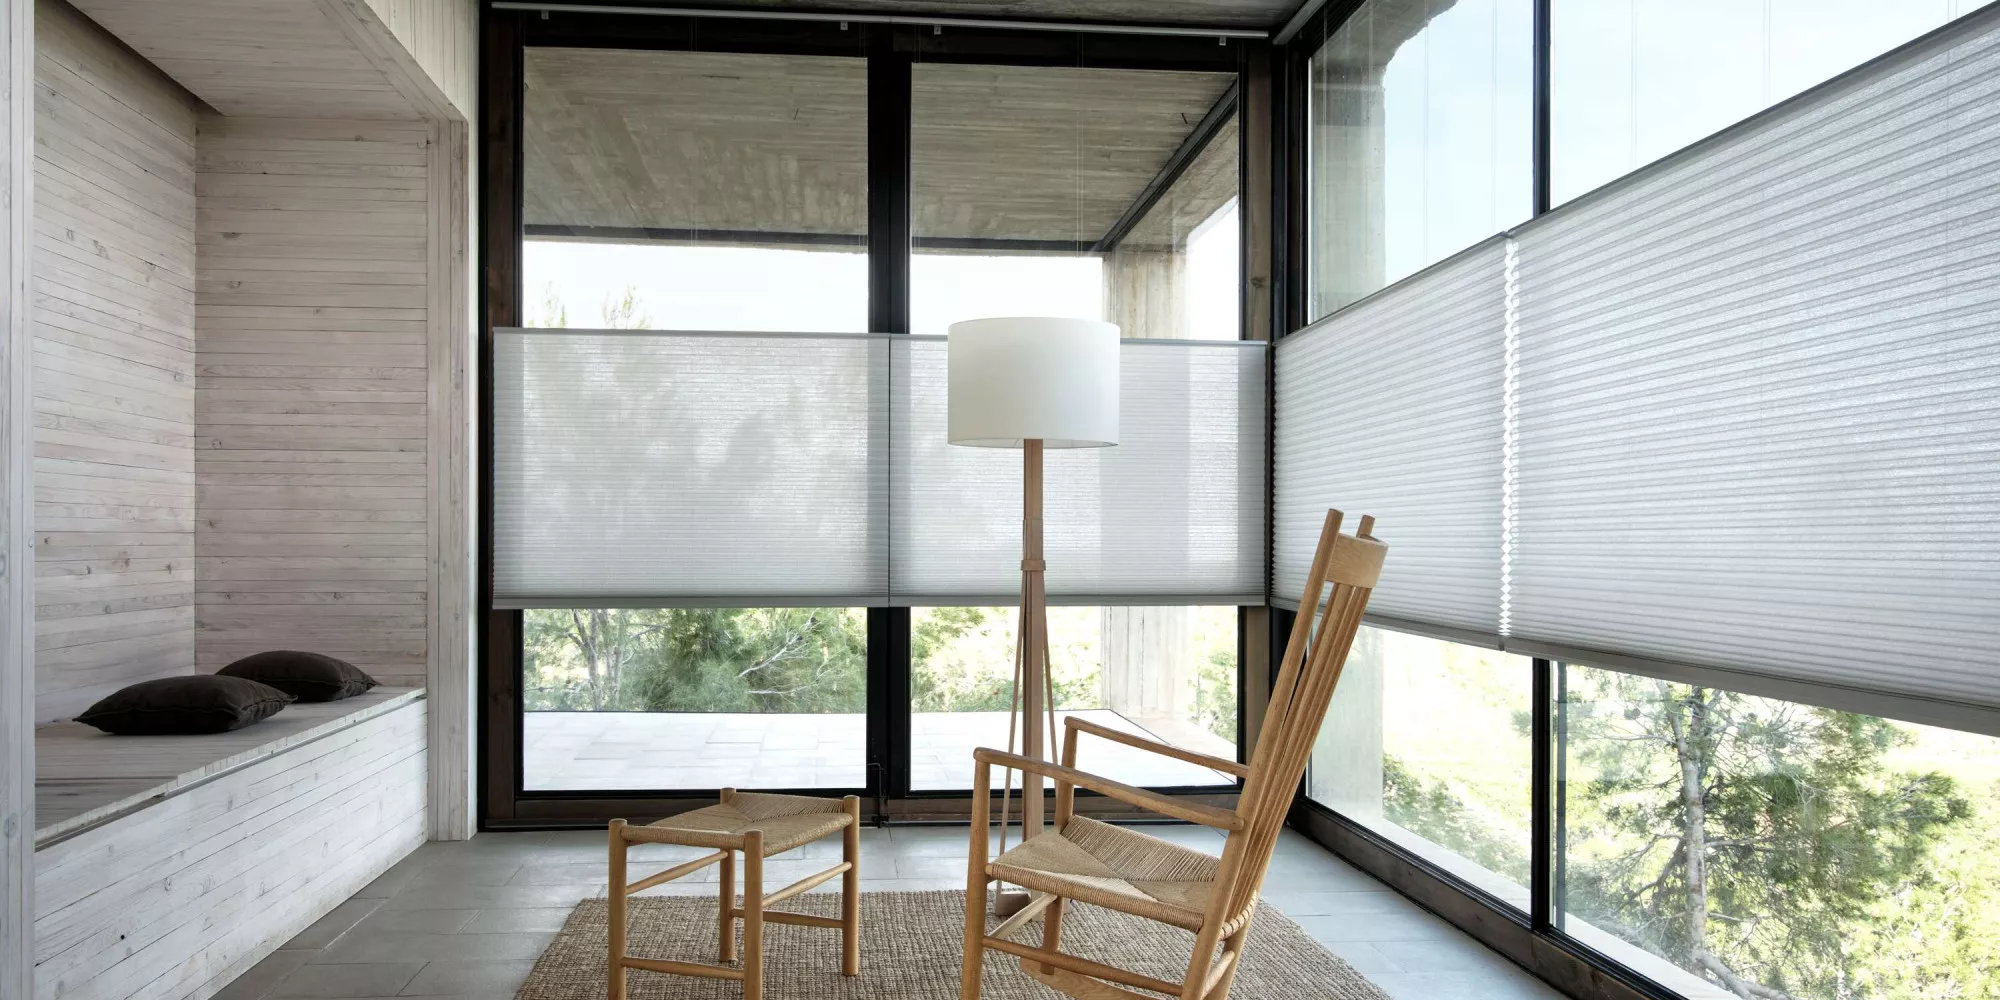
Unlike other blinds and shades, top-down bottom-up honeycombs have two moving bars under their head rail. There is the bottom rail and the middle rail, moving up and down independently of each other with a cellular fabric in between. This allows to cover the bottom of the window for privacy, while leaving the top uncovered for daylight to come in and a nice view through to the sky.
Honeycomb shades that are powered by Eve Motionblinds motors work with Apple HomeKit – directly from your iPhone. Although HomeKit does not yet offer specific functionality for operating top-down bottom-up blinds, you can make them work to perfection by automating them through scenes.
In this blog, we explain how to setup tdbu honeycombs with Eve Motionblinds motors in Apple HomeKit.
Step 1 – Add the motors to HomeKit
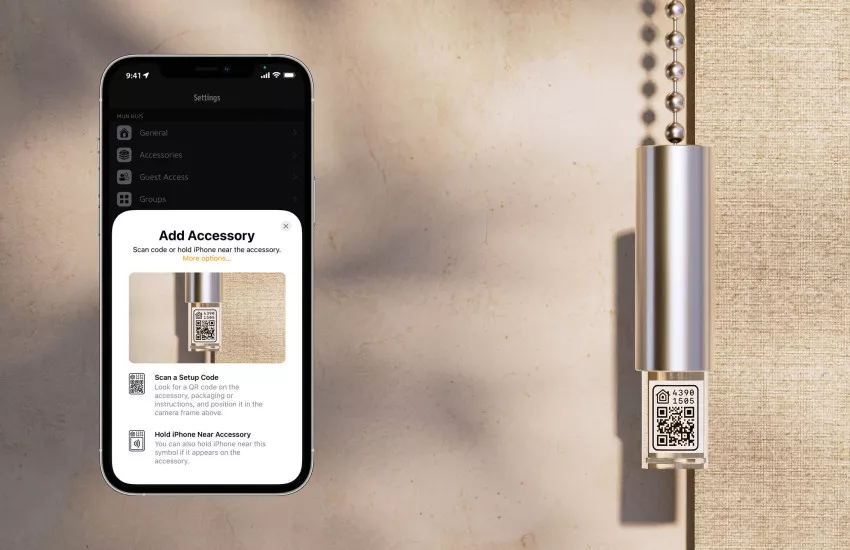
Image: Scan the HomeKit setup code from the Eve for HomeKit app.
TDBU honeycombs are powered by two built-in motors. Each motor operates one of both rails. The one motor the middle rail, the other the bottom rail. First of all, both motors must be added as separate devices to the HomeKit ecosystem.
Download and open the Eve for HomeKit app (no registration required). Go to "Settings" and select "Add Accessory". Scan the HomeKit setup code of motor 1. Check which rail is being controlled by this motor and give it a logical name, for example, "middle rail honeycomb kitchen". Repeat these steps for motor 2 and name it, for example, "bottom rail honeycomb kitchen".
Step 2 – Create the scene “opened”
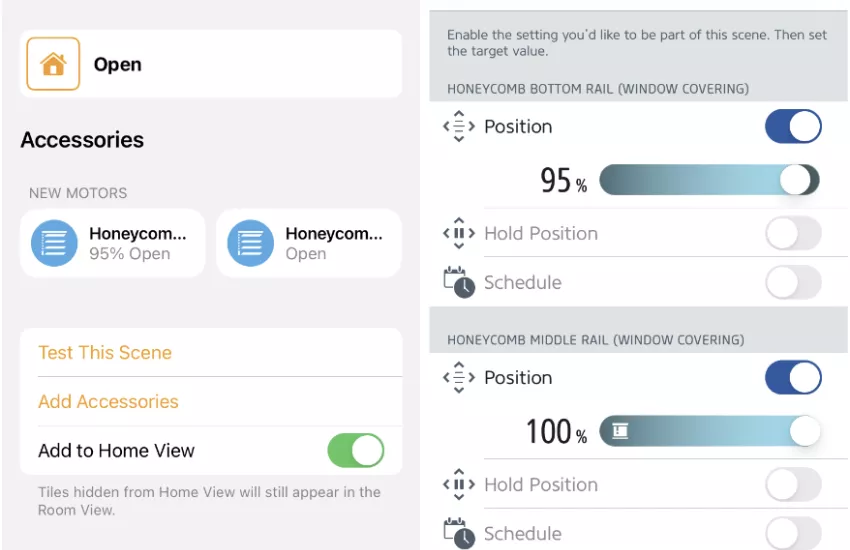
Images: TDBU open scene in the Home app (left) and Eve app (right). Window 0% open at the top and 95% open at the bottom.
TDBU blinds have a built-in stopper which prevents the two rails from lifting or hitting each other. As soon as the rails come together, they automatically stop moving. To avoid this, we recommend creating a scene where the tdbu honeycomb is fully open, with both rails positioned at the top of the window, whereby the top position of the bottom rail is set about 5 percent lower than the top position of the middle rail.
This is beceause when your tdbu honeycomb is fully opened and both rails move down from their top position, it may happen that the middle rail starts moving just a bit ahead of the bottom rail. This scene prevents the middle rail from hitting the bottom rail, causing the rails to stop moving.
New scenes can be created in either the Eve for HomeKit app or the Apple Home app. When you create a scene in the Eve app, it will automatically appear in the Home app as well, and vice versa. T he images show how the scene w e describ ed above – the blind open wit h bo th rails up – looks like in both apps.
Step 3 – Create more TDBU scenes
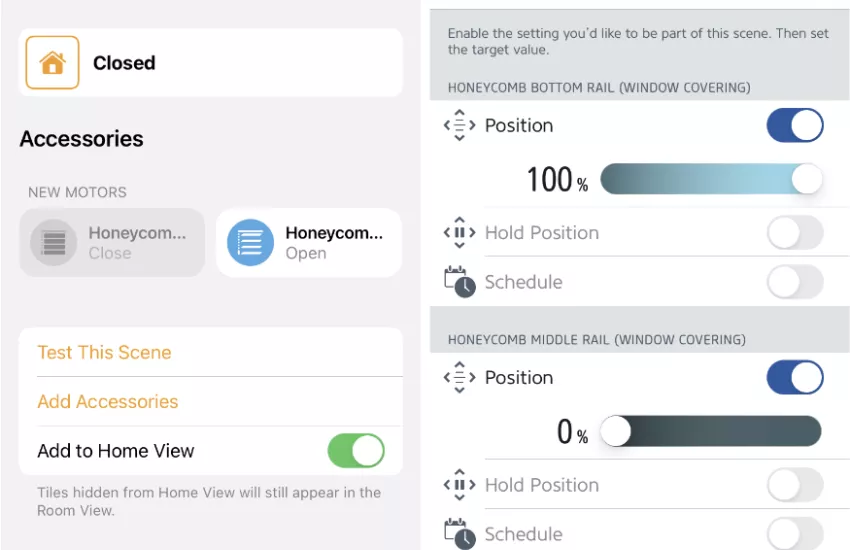
Images: TDBU closed position in the Home app (left) and Eve app (right). Window 100% covered.
When controlling your tdbu blind, the bottom rail operates as expected. Command it to open and it will rise to the top of your window. Tell it to open to 50 percent and it will move to 50 percent of your overall window height. Say close and it will move back to its bottom position.
Things get different with the middle rail which works in reverse – the opposite of reality. Command it to open and it will move upward causing the blind to close. When you say close, the middle rail will move down causing the blind to open from the top. This requires some thinking.
That is why it is very helpful to program and automate the frequently used positions of your tdbu blind through scenes and rules. Just like we already did in Step 2 for the "open" position. The "closed" position shown in the image – the window completely covered – is a second common scene for tdbu honeycombs that you could program.
Step 4 – Make your blinds work with other devices
Needless to say, it is now possible for Eve Motionblinds to work seamlessly with other devices through HomeKit automations. For example, the lighting or thermostat. In this way, your tdbu honeycombs can perfectly help to regulate daylight, climate and privacy in the home. All by itself, without you having to think it through.
Artigos de blog relacionados